I have a upcoming swap due this month for my Dyehards group and the theme is Over-Under. I’ve never done this type of complex cloth before so it was a new learning experience for me and since everything turned out quite well I’m pleased.
I drew a lot of inspiration from Ann Johnston’s book “Color by Design” so if you’re interested in this type of fabric dyeing I strongly encourage you to buy her book as it’s all there, a little powerhouse of a book.
I have to admit that after sternly telling myself to take pictures of the steps along the way I got caught up in the process and didn’t so what I have are the finished products and I’ll explain what I did to get there.
I used dry soda-soaked fabric as my base and then added thickened dyes to the fabric to create my pieces. The thickened dye was dye concentrate mixed with print paste.

The table that I work on isn’t large enough to hold a 44″ piece of fabric so I took the one yard and divided it into two managable pieces. First I taped plastic to protect the table and then I took a piece of large-sized bubble wrap I found in the garage and taped that on top of the plastic. I had some debate as to whether I should put the thickened dye on top of the bubbles or lay the fabric on top and roll the dye over the fabric. I decided to roll the dye on top of the fabric because cleanup would be easier.

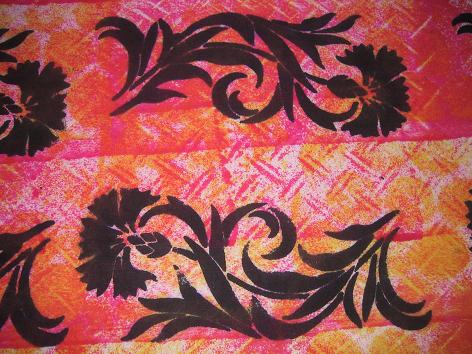
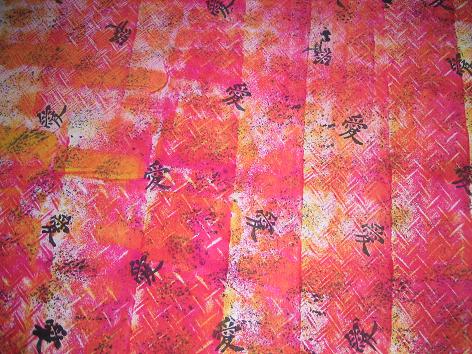
Look closely and you can see golden yellow circles in the background. In her book Ann mentioned that the grid on the paint tray will indent the foam roller if you press hard enough so I tried this out with the fuchsia dye and it works really well, I was surprised so if you look at the fuchsia you can see some cross-hatch marks.
Next I took an old stencil and used some thickened black to make the flowers. I started off using a foam brush put it pushed the dye under the cutout and was blobby so I took a rounded pouncing foam brush and made up and down dabs, much better.

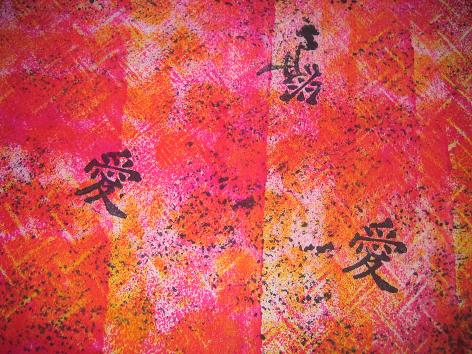
This second piece was much the same as the first but this time I took a rubber stamp, the Japanese symbol for love, and using the circular foam brush I tapped black dye on it and stamped in various locations all over the fabric.

There seemed to be a lot of white space on the fabric so I took a sea sponge and lightly dipped it into the black and gently sponged all over the piece to give it more texture.
The pieces were fairly dry at this point so I covered them up but was worried that they wouldn’t stay damp even though I know that the urea will work to keep the fabric moist for the dye to bond. Anyhow I gave into impulse and several hours later ended up lightly misting the two pieces with water, something I regretted as a couple of hours later when I checked the black had begun to diffuse and I lost the sharp edges of my designs.
Not to worry though because in the washout the crispness was restored so I have a feeling that adding the water several hours later didn’t really do anything for the fabric because the dye had bonded by that time anyhow. Next time I won’t mist and I’ll only work on one piece at a time so the fabric will be fairly damp by the time I cover it.
Karen

Karen, these are really terrific! Great results!!
love um. You did a great job!!
Amazing Karen. You have done a wonderful job and the effects are outstanding.
Karen, Those are great Fabrics. You have definitely inspired me to play. Thanks for the instructions on how to do it. You always make it so much easier for me to figure things out by your descriptions.
Wow! That is just awesome! You have such patience and how do you get so much done!
hugz:)
Candi